We may earn money or products from the companies mentioned in this post.
(This post may contain affiliate links and I may earn a small commission when you click on the links at no additional cost to you.)
As I was thinking of Summer activities to do with my toddler I kept coming up with games that use beanbags. Only problem…. I didn’t have any and didn’t really want to spend the money to by them. So I made them myself…. I mean, come on, what did you expect me to do? They were so easy, you can make these DIY Beanbags too!!!
Materials needed:
Fabric – I used some leftover flannel I had from a baby blanket I made a few years ago. You can use any kind of fabric, but keep in mind what you will be using them for so they will hold up. For more outside play you might want a heavier fabric such as denim or twill.
Cutting mat
Ruler – I didn’t have one handy, so I used the straight edge of a curtain rod I had lying around. Be creative, really you just need a straight edge.
Rotary cutter – You could use scissors, but it’s quicker with a rotary cutter.
Scissors
Thread
Sewing machine (or needle)
Dried beans – I used red beans. One of them actually has garbanzo beans since I ran out of red beans and didn’t want to run to the store.
Measuring cup or food scale – Something to measure out the beans, especially if you want them the same weight as I did.
Cut the Fabric into Squares
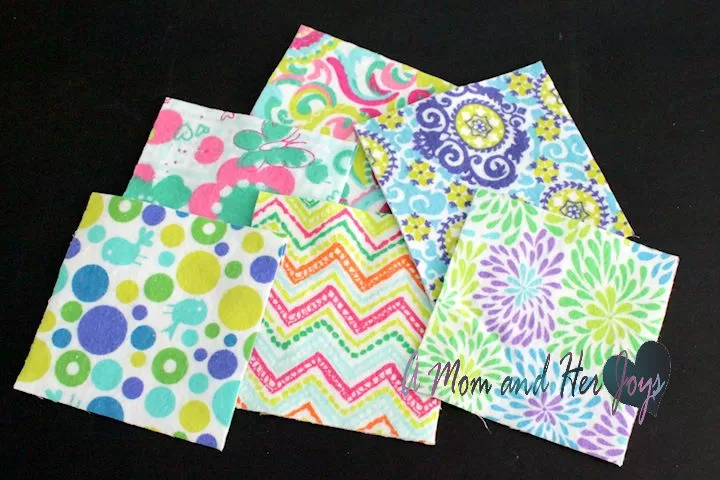
Start by cutting 2 pieces of fabric for each beanbag. I made 6 beanbags so cut a total of 12 squares out.
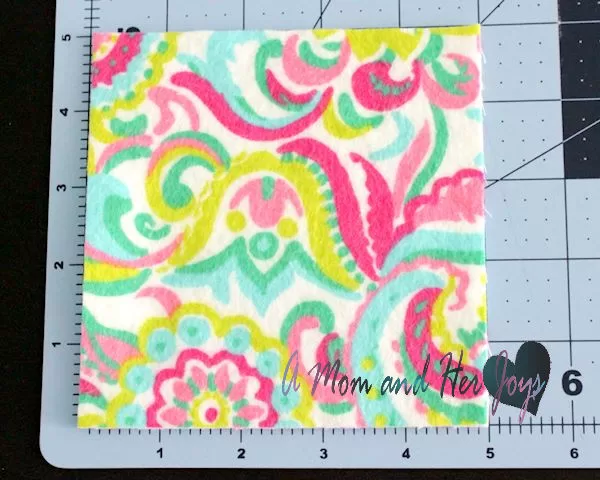
The beanbags I made were a final dimension of 4×4. So I cut out 5” squares so I would have ½” seam allowance all of the way around.
You can make any size you want, or any shape. Just make sure you leave a seam allowance.
Sew Right Sides Together
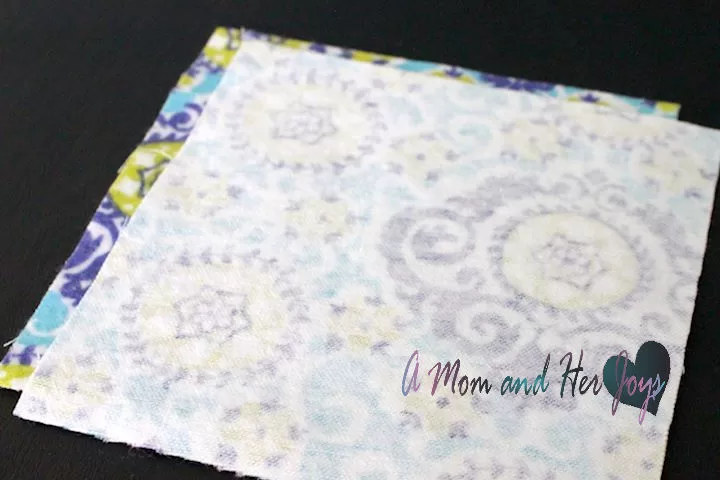
Lay two pieces of fabric with right sides together (patterned side against patterned side). Match up the edges as best as you can. You can pin them together if you want, especially if you have slippery material. The flannel stuck together pretty well so I didn’t bother with the pins.
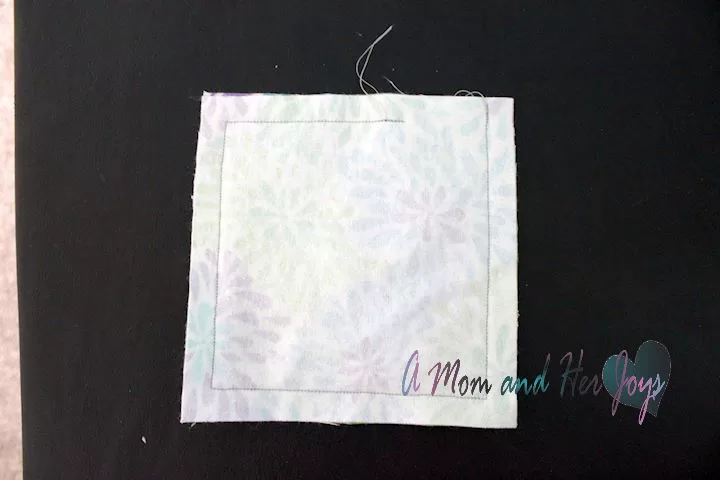
Sew around the edge of the square (I sewed ½” in from the edge because that’s what I cut as my seam allowance). Leave an opening of 1 – 1½”. (This will be used to turn the bag right side out and fill with beans).
Tidy up the Square
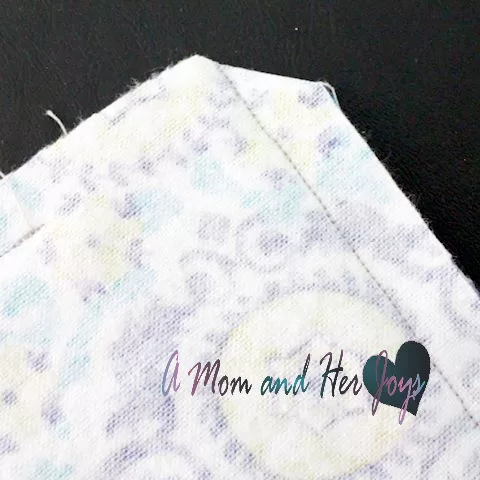
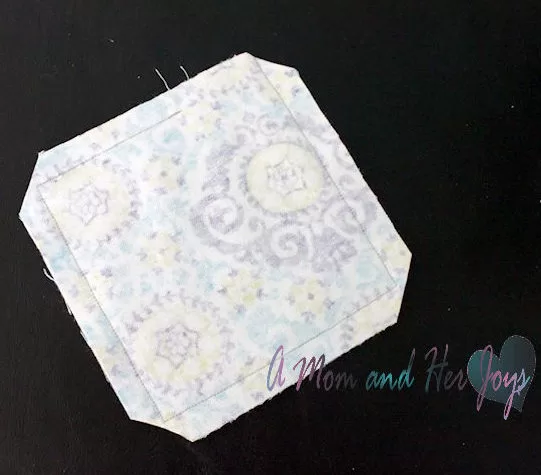
Cut the excess strands of thread with your scissors. Cut the points off of the corners (makes it lay flatter and less bulky) being careful not to cut across the stitched line.
Turn the Bag Inside Out
I guess it would be right side out.
If the opening is smaller, this can take a little longer. A bigger opening will make this much easier. But just keep manipulating the fabric until the entire thing is turned right side out, leaving the stitching on the inside of the bag.
Fill with Beans
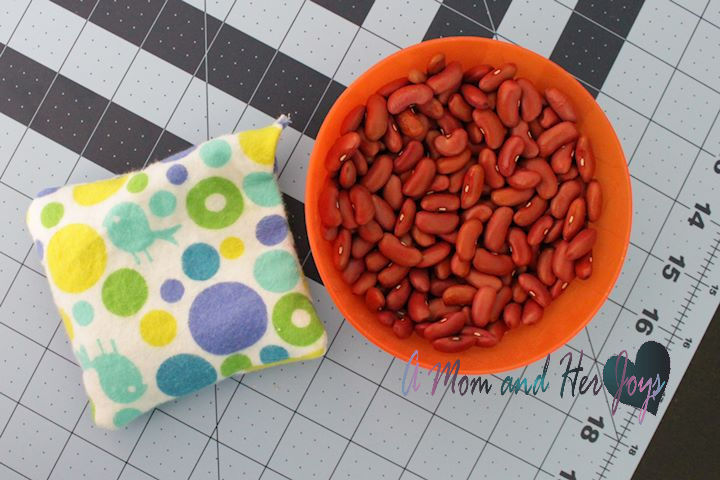
I made a funnel out of some paper and filled the bag with red beans. Until I ran out… and then I used some dried garbanzo beans I had lying around.
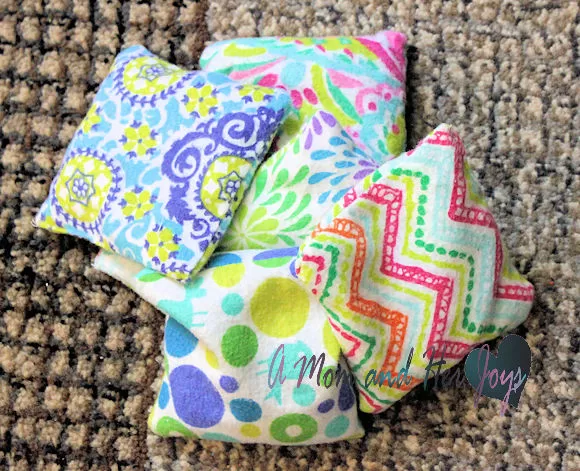
I wanted all of my beanbags to be the same weight, so I used a kitchen scale and put 3 ounces of beans in each one. These are perfect for my almost 3-year-old to toss around and my 11-month-old LOVES playing with them too.
You can make them any weight you choose, just don’t fill them too full. Remember you still have to close that little opening.
Close the Opening
Fold the seam allowance at the opening into the beanbag. Hold it down flat and top stitch right along the edge. I had enough room I could use my sewing machine, but you may need to use a needle and thread for this part.
If you wanna be FANCY you can use an invisible stitch. I didn’t care that much how the beanbags looked so I just used a basic top stitch. The clean up any hanging threads and….
Ta-Da!!!
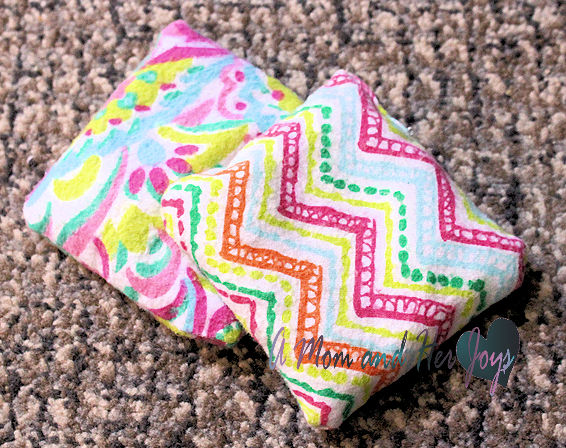
You have a beanbag with endless possibilities.

Since making these last week we have used them in numerous ways. We’ve balanced them on our heads, played keep away, bounced them on the trampoline, and practiced throwing. I know we will find even more ways to use them this Summer.